Create Client Quotes and Invoices in WordPress
Create client quotes and invoices in WordPress
Follow one piece of work from an enquiry, through a quote and a job, to a finalised invoice and a recorded payment — without leaving WordPress, and without an integration in sight.
For a service business an invoice does not start as an invoice. It starts as somebody asking whether you can do something. Lead to Cash keeps that whole path — enquiry, quote, customer, job, invoice, payment — as one connected set of records in your own database.
This walkthrough uses manual entry and a manually recorded payment on purpose. It shows what the free workflow does on its own, before any form capture, email sending or accounting integration is involved.
Before you start: the settings that gate everything
Lead to Cash will not let you send a quote until it knows who is sending it. Fill these in under Settings first, or the first quote stops with “Company settings are not ready for delivery”:
- Legal company name
- Tax ID — CVR on a Danish profile
- Company address
- Company email
- Payment details — the text that tells a customer how to pay
- Sender name and sender email
The first time you open the app it offers Easy Setup, a four-step wizard that asks for exactly these. You can take it, or choose Skip setup and fill them in yourself. Check the currency, tax settings and invoice branding at the same time. The interface language and the document language are separate: changing what you see in the app does not change a document that already exists.
Use fictional records. A walkthrough creates real rows in your database and real numbers in your invoice series. Do it on a demonstration site, not in the books you file from.
1. Record the enquiry
Open Enquiries and choose New enquiry. Give it a subject, the customer’s contact details, and enough description to price the work. Add the person responsible for following it up, and a next action if one is already agreed, then Save enquiry.
For this example: a fictional Demo Client asking for a yearly website maintenance review. Entering it by hand is the point — capturing enquiries automatically from a website form is a Pro feature, and keeping it manual here shows the record the rest of the workflow hangs off.
A new enquiry starts as New and moves through its own list of states — Contacted, Awaiting customer, Quote drafting, Quote sent, Won, Lost. The contact is created alongside it, but it is not a customer yet.
2. Write the quote
From the enquiry, or from Quote → New quote, create the quote. Use Add line for each item, or Add from price list if you keep one, and give it a title the customer will understand. A quote can hold up to 50 lines.
The totals follow the lines, and the quote is created as a draft: editable, and not yet numbered.
Preview quote renders the PDF there and then, on the draft, before anything is sent. The Free plugin builds the document itself, with your branding and in the document language you configured — no add-on involved.
3. Send it, then record the answer
Mark the quote sent. That is the step that gives it its number — QUO-2026-00001 in a fresh series — and it is also where the company settings have to be in place. A draft carries no number at all.
A quote moves draft → sent, and only then to won, lost or expired. You cannot jump from a draft to a won deal, which is deliberate: an accepted quote is the answer to something that was actually presented.
When the customer says yes, mark it won. The enquiry it came from becomes won at the same time, and the contact becomes a customer with its own record and history.
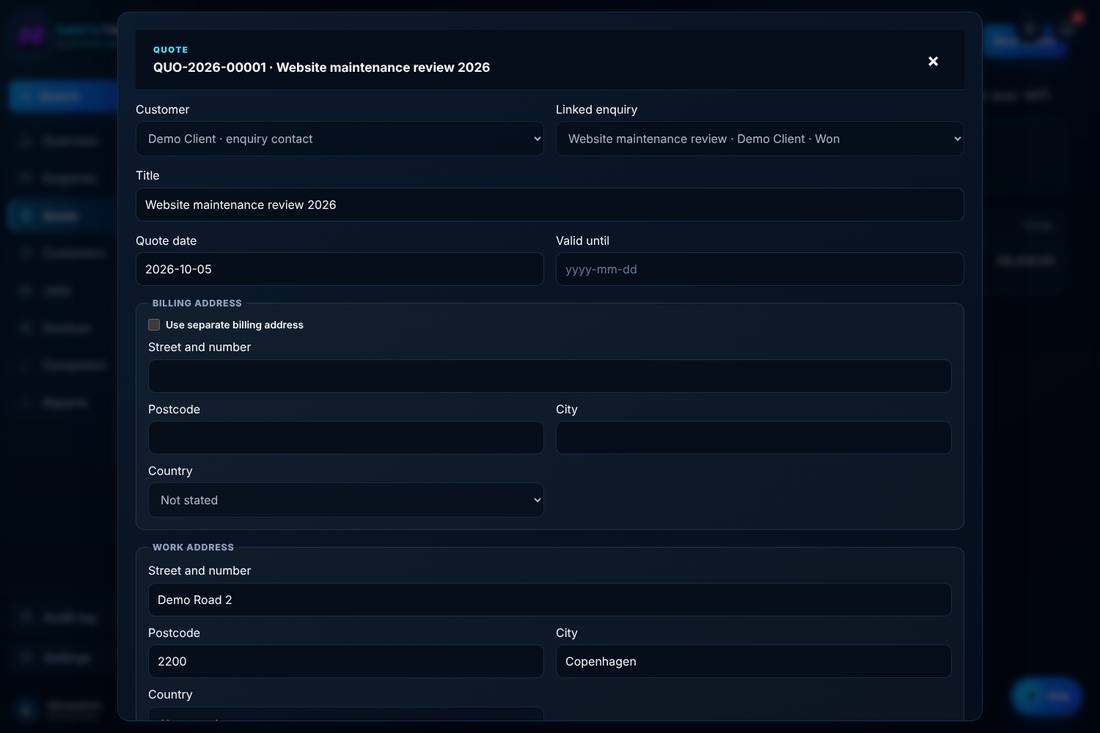
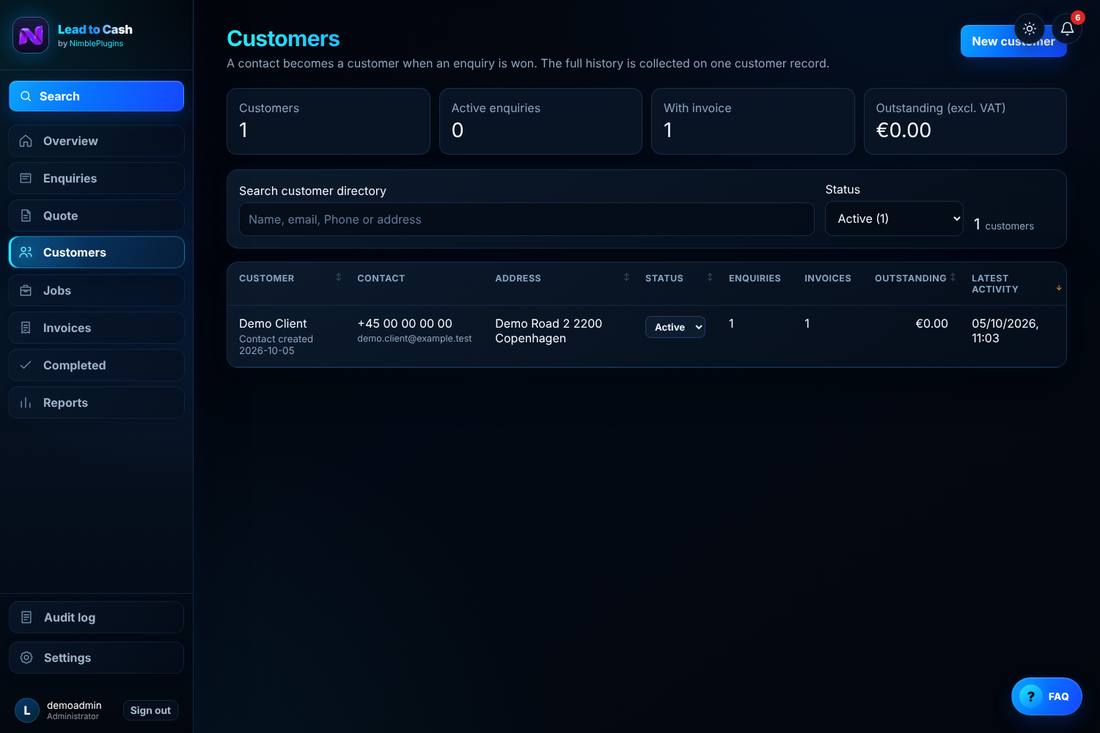
Delivering it is a separate question. Free produces the PDF; sending it to the customer by email is part of the Pro add-on. With Free alone, download the PDF and send it however you already send documents.
4. Create the job
Create the job for the agreed work. You can do it straight from the quote with Create job, from the customer record, or from Jobs → New job. It gets its own number — JOB-00001 — and starts as planned.
A job always belongs to a customer, not to a contact that is still a prospect. Winning the enquiry is what turns the contact into one. If you are working without an enquiry at all — a customer who simply rings up — create the customer first and give it a job directly; nothing requires an enquiry to exist. What you cannot do is convert an enquiry that has not been won: that route answers “Only a won enquiry can be converted to a job”.
5. Raise the invoice
Choose New invoice draft from the job, the customer or the enquiry, and relate it to the job. Add the lines — copying them from the quote keeps the paperwork honest — and check the payment terms, the tax and the dates.
A billing address is required before the invoice can be finalised. If it is missing, fill in the invoice’s own billing address fields. You can also maintain the customer’s address for future documents.
Then finalise. Finalising assigns the invoice number (INV-2026-0001), sets the due date from your payment terms, and closes the document: an attempt to edit it afterwards is refused with “Only invoice drafts can be edited”.
Closed is not carved in stone, but the way back is narrow. On an ordinary invoice that is finalised and not yet sent, Reopen invoice puts it back to draft; correct it, finalise again, and it keeps the same number. Once it has been sent that route is closed — even if nothing has been paid — and it stays closed after payment, when a correction means Create credit note instead. Two other things also close it: a credit note is never reopened, and neither is an invoice that has already been handed to an accounting integration.
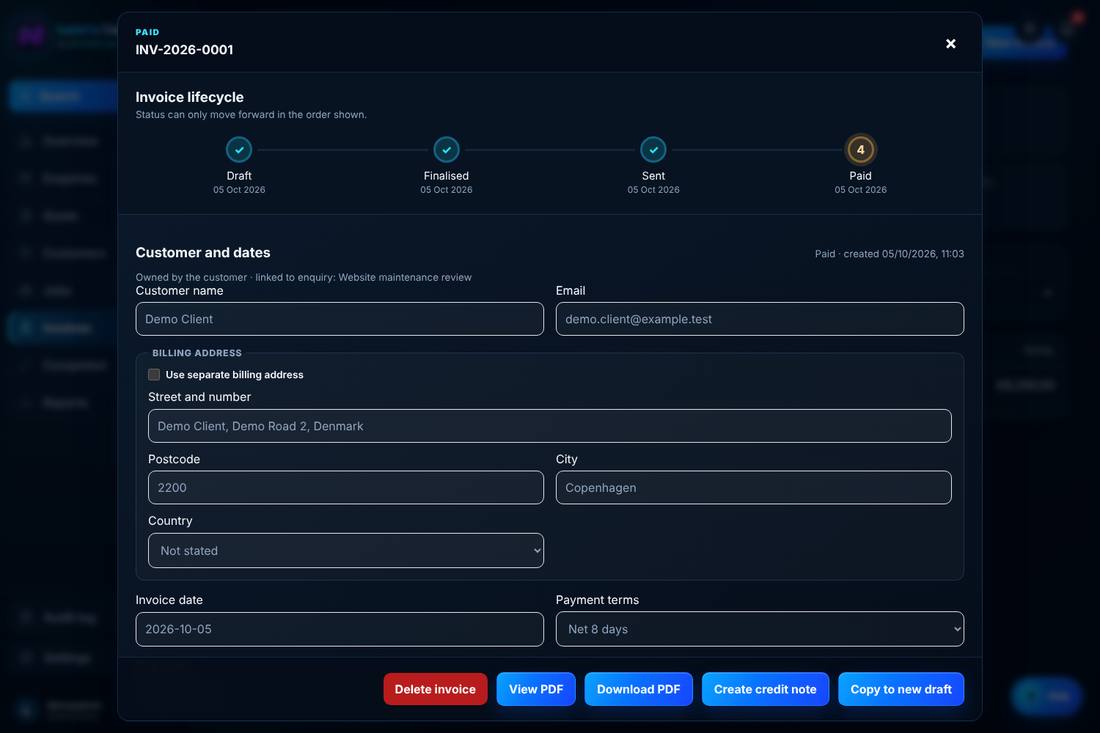
6. Record the payment
When the money arrives, record the payment against the invoice with the amount and the date. Pay the whole of what is still owed and the invoice moves to paid with nothing outstanding. Pay part of it and the outstanding amount drops by what you recorded. Either way the payment is kept as part of the invoice’s history.
Two rules are worth knowing before you try. A payment can only be recorded on an invoice that has been finalised or sent — a draft refuses it. And a payment cannot exceed what is still owed: more than is left is turned away. A part payment on a sent invoice leaves it sent, with the remainder outstanding.
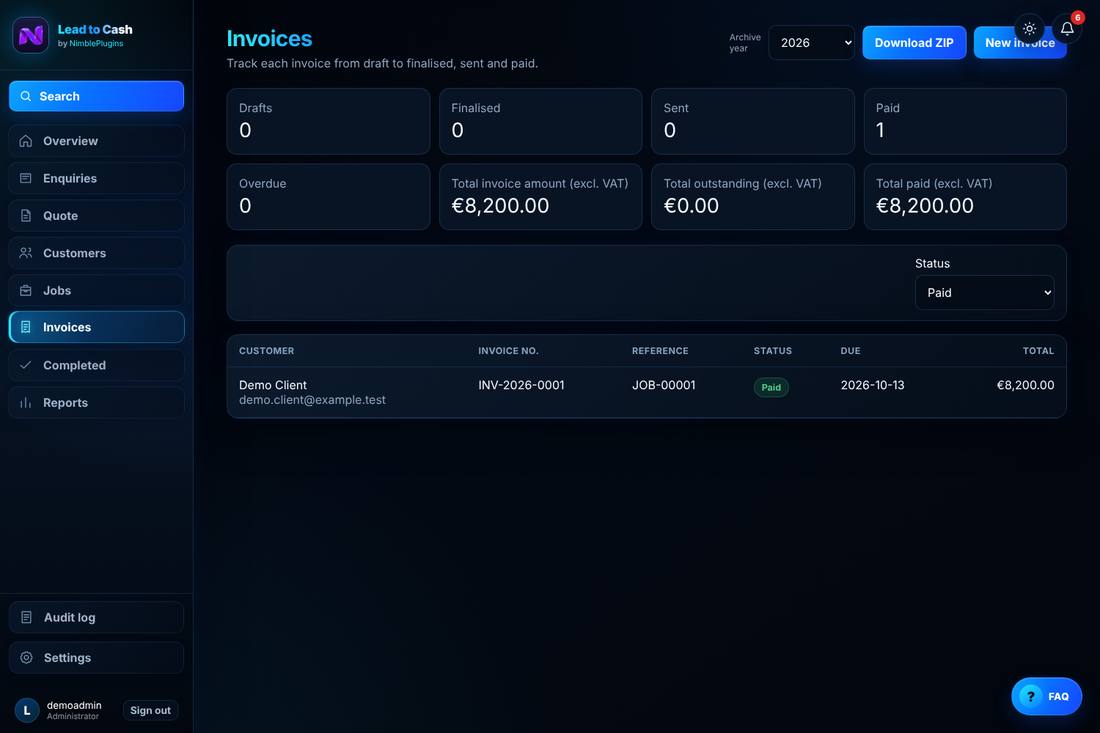
This is a record, not a reconciliation. Recording a payment means a person is telling the system the money arrived, and the entry is stored as a manual one. Matching payments against a bank feed, or taking them through a payment provider, is a different piece of machinery. Do not demonstrate manual recording and describe it as automatic confirmation.
7. Follow the thread back
Open the enquiry, the customer, the job and the invoice in turn. Each one still points at the others: the invoice carries its enquiry and its job number, the customer carries the whole history, and Audit log carries who did what.
That is the part worth testing on your own data. Documents are easy. Being able to answer “what was agreed, when, and on which job” six months later is the thing a folder of PDFs cannot do.
What Pro adds — and when it is worth it
Lead to Cash Pro is a separate add-on with its own licence. The free plugin contains no licence check at all, and nothing in it is gated or time-limited.
Pro covers the integrations: capturing enquiries from website forms, sending quotes and invoices by email, payment reminders, a calendar, receipts, accounting export, and the installable mobile app.
Of the accounting connections, Dinero is the one in daily production use. The others are newer and still being put through their paces, so ask before you plan a migration around one of them.
Start with the free workflow. Add Pro when a specific task you repeat every week is the thing standing in your way — not before.
Sources
Screenshots use 1.37.9; the workflow shown is unchanged from 1.37.8. Every name, address and amount in them is invented.